

Category: Amazon Finds
Build a truck-bed bourbon bar that survives potholes, crowded parking lots, and the friend who thinks “portable” means balancing everything on a cooler lid. This guide covers the table, storage, ice, mixing station, lighting, blanket, dispenser, drinks, safety, and a few smart upgrades for a smoother gameday tailgate anywhere outdoors.
Reading Time: 7 minutes: shorter than the wait for a patio table.
A great tailgate is part sporting event, part outdoor living room, and part logistical test administered by people who forgot the bottle opener. The solution is a portable bar setup that packs down securely, opens quickly, and keeps bourbon service from becoming a wrestling match with three coolers and one melting bag of ice.
This truck-bed build is designed for practical hosting. It gives you a clean mixing surface, protected storage, cold drinks, comfortable seating, and enough atmosphere to make the parking lot feel less like a parking lot.
Before loading a single bottle, check the rules for your stadium, campus, city, and parking area. Alcohol policies vary wildly. Some venues prohibit it entirely, some allow it only in designated areas, and public open-container rules may still apply. Also: designate the driver before the first pour, keep alcohol away from the truck cab, and never move the truck once service begins.
Start With the Layout, Not the Bourbon
The best truck-bed bars use three zones:
- Build zone: Ice, bourbon, bitters, mixing tools, garnishes, and water.
- Serve zone: Finished drinks, napkins, cups, and nonalcoholic options.
- Storage zone: Extra supplies, valuables, cleanup gear, and anything you do not want rolling into traffic like a tiny plastic getaway car.
Keep heavy items low and close to the truck’s front wall. Put the cooler and gear box on opposite sides if possible, then leave the center or tailgate area open for your work surface.
Everything should be secured with tie-down straps, bed anchors, or non-slip mats. A truck bed is not a kitchen island. It is a metal tray attached to a moving vehicle with suspension designed to make your carefully arranged garnish tray reconsider its life choices.

Step 1: Choose a Rugged Collapsible Table
Your bar top needs to be stable, wipeable, and easy to carry. A rugged folding camp table can work, but a portable high-top bar table gives you a better serving height and hides some of the clutter underneath.
One researched option is the GoBar Portable High Top Party Bar, which folds into a carrying case, sets up in less than a minute, includes a lower storage shelf, and measures approximately 39 inches wide by 36 inches high by 15 inches deep. It weighs about 12 pounds and has a water-resistant MDF surface.
That is convenient, but do not treat a lightweight folding bar like a structural beam. The manufacturer warns against overloading it, and customer feedback is mixed on the sturdiness of the lower shelf. Use it for cups, napkins, mixers, and light supplies: not a pyramid of bourbon bottles and the emotional weight of your fantasy league.
For a DIY version, use a sealed exterior-grade plywood top with folding legs. Add a rubber bar mat, a raised edge, and a non-slip surface underneath. Test the table at home with the full working load before game day.

Step 2: Add a Lockable Gear Box
A lockable toolbox or weather-resistant gear box is the unglamorous hero of the whole operation. Use it for:
- Bar tools
- Bitters and syrups
- Napkins and straws
- Extra bottle openers
- Batteries
- Trash bags
- Cleaning supplies
- Wallets, keys, and anything else that should not disappear during a halftime bathroom expedition
Choose a box with a gasketed lid if the weather looks questionable. Secure it to the truck bed with straps or a cable lock. If it contains alcohol, keep it closed whenever you are not actively serving. A gear box is storage, not a public-access liquor cabinet with hinges.
Step 3: Bring One Serious Insulated Cooler
A proper cooler does more than chill drinks. It creates a cold-storage system that keeps mixers, water, garnishes, and food from becoming warm evidence.
The YETI Tundra 65 is one option to consider through our affiliate link. The 65-quart cooler has rotomolded construction, thick insulation, non-slip feet, and molded tie-down slots designed to help secure it in a truck bed. It is also heavy: roughly 30 pounds empty: so this is a set-it-down-and-leave-it cooler, not a cute little lunchbox.
Use two ice systems:
- Bulk cooler: Food, water, canned drinks, chilled mixers, and backup ice.
- Working ice bin: A smaller insulated bin beside the mixing station for clean cocktail ice.
Keep the cooler closed as much as possible. Every dramatic lid slam costs you cold air, and every guest opening it to “look around” is conducting a personal science experiment in heat transfer.
Step 4: Build the Mixing Station
The mixing station should be compact and predictable. Put everything in the same place every time:
- Jigger
- Mixing glass
- Bar spoon
- Strainer
- Rubber bar mat
- Cutting board
- Citrus peeler
- Bitters
- Simple syrup
- Orange peels
- Cocktail cherries
- Plastic rocks cups
- Paper towels
Use plastic or durable shatter-resistant cups instead of glass. Broken glass on asphalt is a terrible garnish and an even worse souvenir for somebody’s dog.
Keep the bourbon lineup tight. Two or three bottles are enough:
- One dependable bourbon for Old Fashioneds
- One higher-rye option for guests who enjoy a little bite
- One bottle for neat pours or tasting
Offer water and a nonalcoholic option at the same station. Good hosting is not just pouring faster; it is making sure the group has choices that do not require a recovery documentary later.

Step 5: Add the Bourbon Dispenser or Decanter
A hand-pumped bourbon dispenser is a fun centerpiece because it makes a pour feel like an event without requiring a full cocktail lounge in the truck bed.
Use a food-safe dispenser designed for beverage service. Test the pump, seal, and spout at home with water first. Keep the container upright, shaded, and away from direct heat. If you are unsure about the materials, use a traditional glass decanter at home and a sealed bourbon bottle at the tailgate.
Most importantly, measure pours with a jigger. A dispenser may look theatrical, but it should not turn every drink into a surprise double. A standard pour gives you better control, helps guests pace themselves, and keeps your bourbon budget from evaporating before kickoff.
A simple menu is all you need:
- Bourbon neat or over ice
- Old Fashioned
- Bourbon and ginger ale
- Bourbon lemonade
- Zero-proof ginger beer or lemonade
Pre-batch mixers where practical, but do not pre-batch high-proof bourbon cocktails unless you can label them clearly and control portions. “Mystery beverage” is not a cocktail category. It is how somebody ends up texting the wrong group chat.
Step 6: Bring the Throw Blanket
The throw blanket is not decoration. It is the multi-tool of the tailgate.
Use it as:
- A seat cover on the truck bed
- A soft surface for coolers or gear
- A shoulder wrap when the temperature drops
- A visual divider between clean supplies and dirty tools
- A quick cover for the bar during a passing shower
Choose something washable, durable, and large enough for two people to sit on. Avoid placing it near grills, burners, generators, or anything else producing heat. Bourbon bar chic is great. Blanket flambé is not.
Step 7: Install Battery-Powered String Lights
String lights make the setup easier to see and turn the truck bed into an actual gathering spot after sunset. Choose battery-powered or rechargeable outdoor-rated lights so you are not dragging extension cords through a crowd.
Clip them along the tailgate, truck-bed rails, or canopy supports. Keep the lights away from alcohol spills, hot grills, and moving hinges. Use warm bulbs for a relaxed bar feel, with bright task lighting aimed at the jigger and mixing station so nobody has to measure bourbon by moonlight and confidence.
Skip open flames. The truck bed already contains combustible materials, pressurized cans, and enough questionable decision-making.
What to Bring to a Tailgate: The Final Checklist
Before leaving the driveway, confirm you have:
- Collapsible table or portable bar
- Lockable gear box
- Large insulated cooler
- Working ice bin
- Bourbon and mixers
- Jigger and bar tools
- Plastic cups
- Water and nonalcoholic drinks
- Garnishes
- Hand sanitizer and soap
- Fresh water jug with spigot
- Gray-water bucket
- Trash and recycling bags
- Paper towels and bar towels
- Throw blanket
- Battery-powered string lights
- Tie-down straps
- Canopy or shade solution
- Phone charger
- Designated driver plan
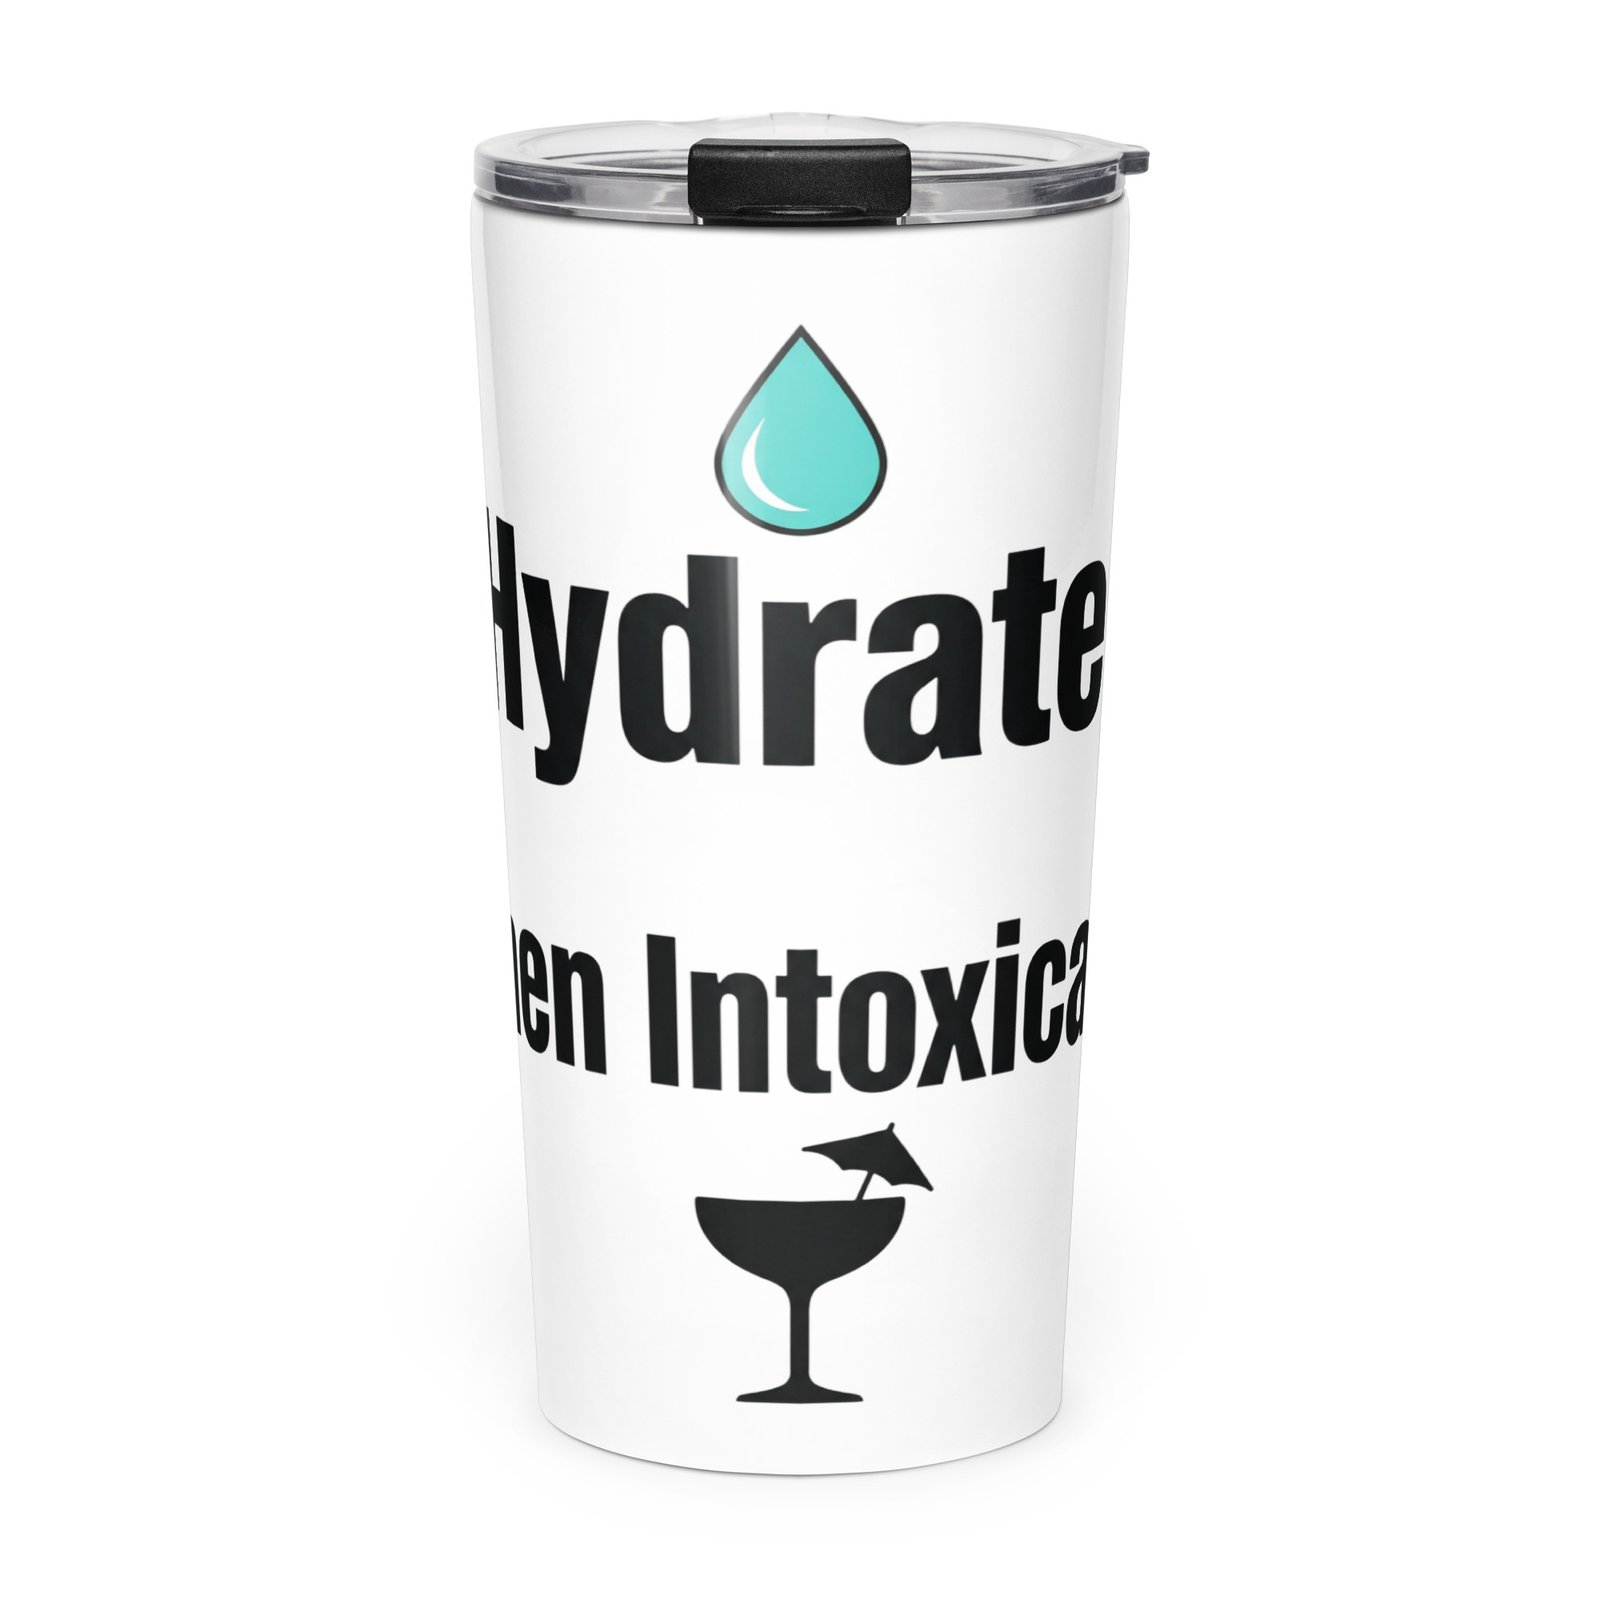
One useful hydration upgrade is the DayDrinkingHQ “Hydrate Then Intoxicate” 20oz Insulated Tumbler. It is a double-wall stainless-steel tumbler with a spill-resistant press-in lid, and the whole joke is also a solid operating procedure: start with water, keep drinking water available, then decide what comes next. It fits standard vehicle cup holders and is dishwasher-safe, which is more than can be said for the mystery cup found under your truck seat in November.
Pack It in Transport Mode, Then Switch to Service Mode
Load the truck bed in this order:
- Secure the cooler and gear box first.
- Place the folded table where it can be reached without unloading everything.
- Store bottles upright in a padded crate.
- Keep the mixing kit together in one tote.
- Put the blanket and lights near the top.
- Add the dispenser last so it does not become a $40 percussion instrument during the drive.
Once parked, set the table on a level surface, check every leg and latch, secure the cooler, and create a clear guest side. Keep the driver out of service, follow the venue rules, and stop serving anyone who is visibly intoxicated. Offer food, water, and a safe ride plan instead of pretending the parking lot is a courtroom where you can argue with gravity.
The finished setup should feel effortless: bourbon within reach, ice where it belongs, tools in order, lights glowing, and enough open space for actual conversation. That is the goal of a mobile bourbon bar: not to recreate a luxury hotel lounge in a truck bed, but to make gameday more comfortable, more social, and far less dependent on somebody balancing a bottle on the tailgate like a carnival act.
Affiliate disclosure: Some gear links in this article may earn DayDrinkingHQ a commission at no additional cost to you. Product details, prices, availability, and venue rules can change, so verify them before game day.